
Creating and Sharing a QMplus Hub Journal / Blog

For: Staff and StudentsApplication: QMplus HubTagged: Investigation , journal , QMplus Hub
A journal on QMplus Hub provides you with your own personal space to record and express ideas and thoughts. Whether you are a member of staff or a student, your journal is completely private…only you can see your journal entries until you decide you want to share them with someone. You don’t have to share with anyone…you might keep your thoughts to yourself…however it’s likely that at some stage you will want to share those thoughts and get feedback on them from others. At that point you can decide how much of your journal you want to share, and with who. If you make your journal completely public, which you can, then what you have is essentially a blog.
The rest of this guide will get you started with using QMplus Hub journals. It assumes that you already know how to access QMplus Hub.
This guide covers:
Where to find your journals
On QMplus Hub, from the main menu, select Create and then select Journals.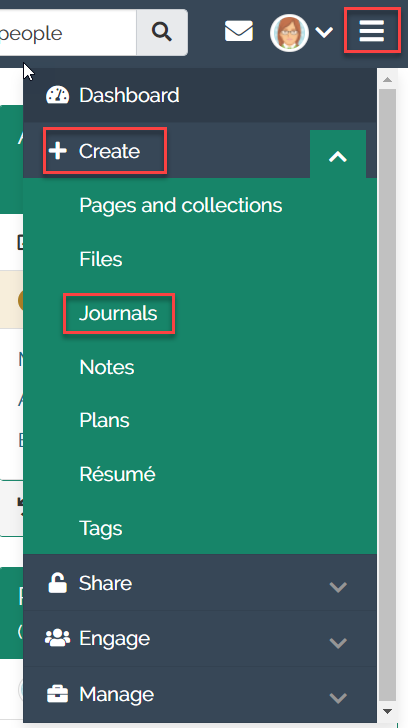
You will now see your journals screen. You will see all your journals listed here. By default, you have one journal. You can, however, create as many journals as you like…and call them whatever you like!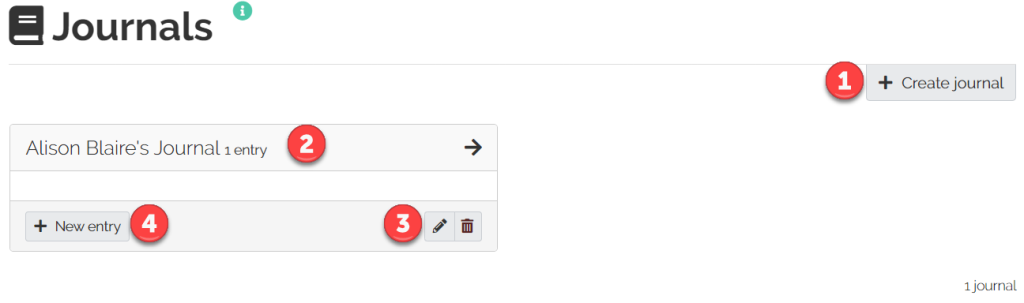
- To create a completely new journal click on Create Journal
- The top section shows the name of your journal and the number of entries it contains. Click on the title to view your journal.
- Clicking on the Settings icon allows you to update your journal’s name, provide a description for it and add tags to it. Tags can be very useful when you are trying to find things in your QMplus Hub content!
- You can post a new entry in your journal by selecting NEW ENTRY.
Creating an entry in a journal
From your journals screen, click on the Add entry button for the journal you want to add the entry to.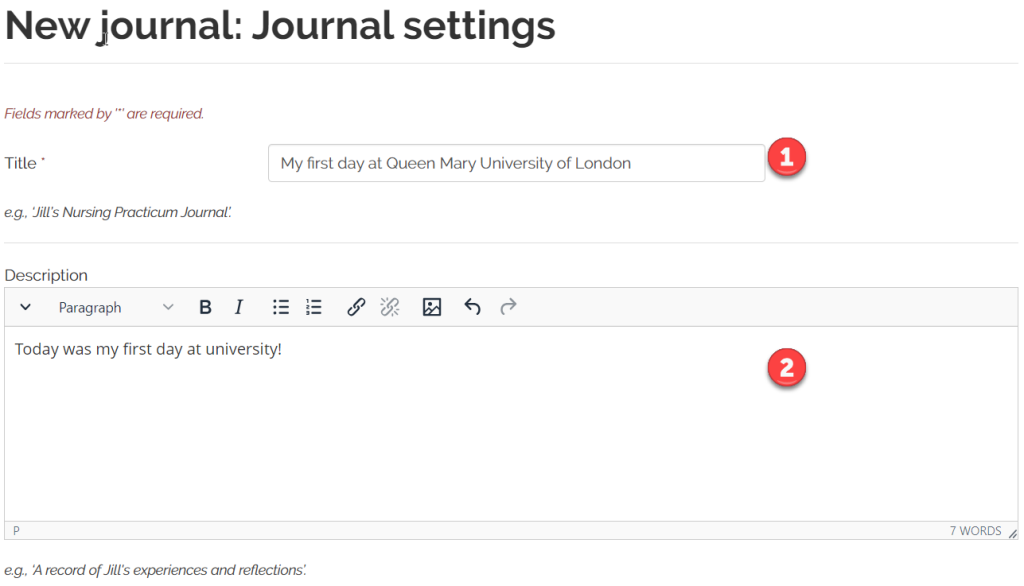
First give your journal entry a nice Title. Now you can start to enter your journal entry using the built in text editor. You will see a number of editing icons and if you click on the downward chevron, as indicated above, you will see the full range of editing options available to you in the editor. You can style the text in a variety of ways, embed images, add weblinks and more.
Once you’ve written your journal entry text, move further down the page.
You can add tags to your journal entry, these tags are personal to you and can help you to organise your content or retrieve content when you have been using QMplus Hub for a while. Type each tag followed by a comma, or, select a tag you have already used by selecting ‘show my tags’. These tags can be particularly useful if you want to share parts of your journal.
When you have finished, click on SAVE ENTRY.
Your journal post will look similar to the example below. You should get a notification that your journal entry was saved.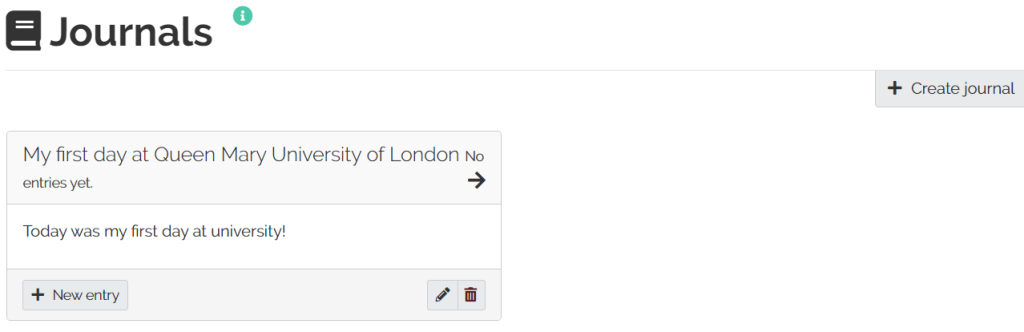
How to share your journal with others
Remember, you don’t have to share your journal with anyone, but the chances are you’ll want to…or you’ll be asked to! How do you do this?
In QMplus Hub the way you share anything with anyone is through a QMplus Hub page. So, in order to share your journal…you have to put it on a page.
From the main menu, select Create and then select Pages and collections.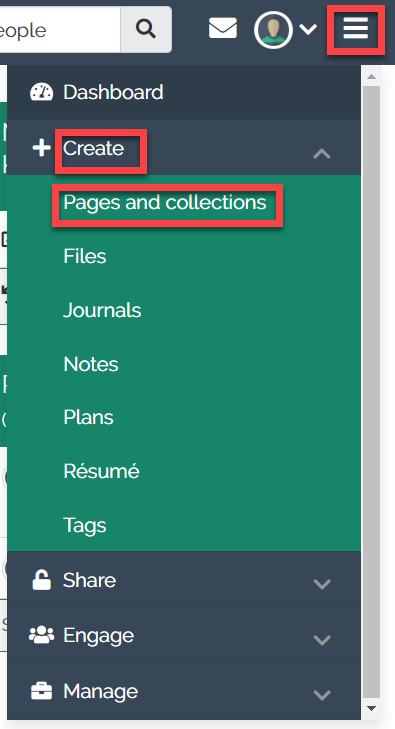
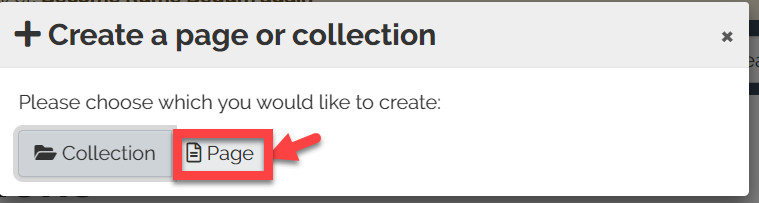
If you have an existing page you’d like to add the journal to, select that page from your list of pages. If you want to create a new page, click the Add option followed by the Page option.
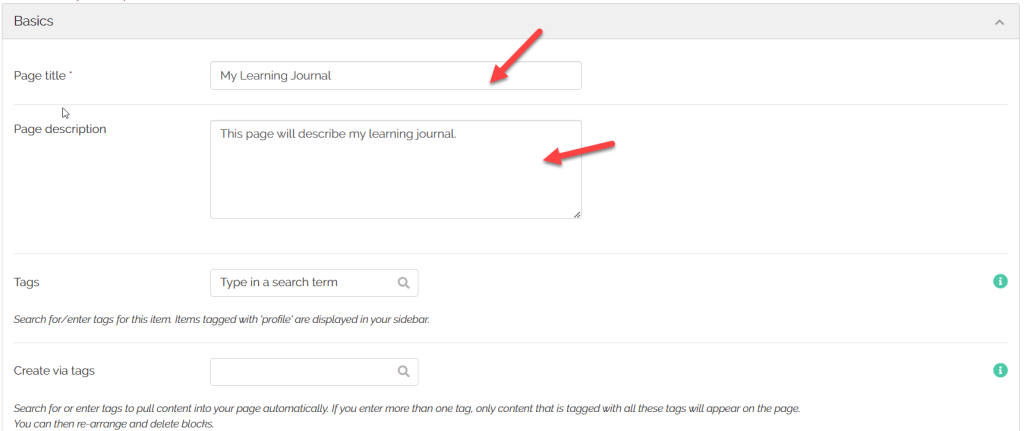
If you are creating a new page you will have to give your page a title and a description.
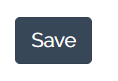
Click Save.
Now you have a page, you can put your journal on to it. When you go to add the journal block, you will find there are four options for journals. The journal can be displayed in the following way: 
- Journal – display the whole journal.
- Journal entry – this might seem like an odd thing to want to do but when you are putting together an e-portfolio, you may wish to highlight a specific journal entry that you made.
- Recent journal entries – this will display just the most recent entries from your journal.
- Tagged journal entries – display all journal entries with a specific tag. This is where tagging your journal entries will come in handy. It allows you to focus on specific entries.
Once you’ve added the journal block you want on the page, you will have to configure it. This will depend on which item you have chosen but will include things like:
- Selecting the particular journal you want to display, if you have more than one journal
- Deciding how many entries you want to display
Once you have made any changes, click Save.
For more information on the different journal blocks, click here.
So…now you have a page with your journal, or bits of it, displayed on it.
Nobody can see that page yet…that’s the next step, to share the page (and therefore the journal).
See our guide on Sharing with others in QMplus Hub for details on how to share the page with the journal on it.
Did this answer your query? If not, you can raise a ticket on the online Helpdesk or email: its-helpdesk@qmul.ac.uk . Alternatively you can also request a particular guide or highlight an error in this guide using our guides request tracker.
Produced by the the Technology Enhanced Learning Team at Queen Mary University of London.
Related items
